Making vehicles for VCTF4
This page serves as a guideline for porting vehicles to VCTF4. Texture editing, UnrealEd and a UnrealScript knowledge (how vehicle code works) are required. For the code part, you can use the VCTF4 source code (available on the downloads page) as an additional reference.
VCTF4 includes VCTF4 versions of all stock UT2004 vehicles and some extra ones. However, there are plenty of custom vehicles out there on several VCTF and ONS maps and also standalone. Unfortunately, they will have problems in VCTF4:
- They do not have skins for green and gold teams, and even if they did, they wouldn't know when to use them.
- Their weapon effects are only available in green and gold.
- There are issues with holding one or more CTF4 flags.
- Create the necessary skins: green, gold, and optionally neutral (a good developer will always provide a neutral skin as well)
- Subclass the vehicle and add the lacking functionality.
- Subclass or add any additionally required classes (e.g. side turrets, emitters, etc).
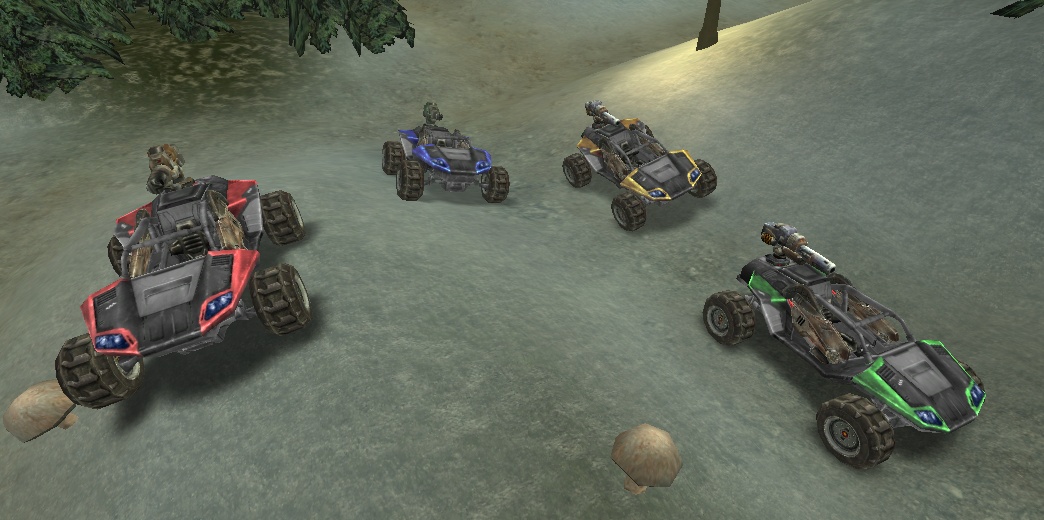
I will write this guideline with an example, which makes it a lot easier to follow. In this example I convert the Minigun Scorpion, which you can find on VCTF-ModernGulch, to a working VCTF4 version.

1 – Creating skins
This is not going to be a Photoshop tutorial or anything, I expect that whoever reads this knows how to use PS (or any other software of choice that supports 32-bit TGA export at least) and how to do what I will describe. I would like to share the method I used to create the skins for the VCTF4 vehicles.
It can basically be divided into the following steps:
- Create a base skin without colors and separate the colored parts into a new texture.
- Create 4 versions of the colored texture.
- Create a Combiner and a Shader to create the fully colored skins.
- You need to create one version only and can do the other 3 simply by changing the hue.
- The color mask textures can be of relatively low resolution, ie you will not end up with 4 1024x1024 textures, saving a lot of space.
- The base skin can be used as the vehicle's neutral skin, no extra work required for that!
1.1 – Creating the base skin
First of all, turn on some music. This is the most time consuming part. Trust me, I can tell after doing this for the Paladin, SPMA and Cicada...
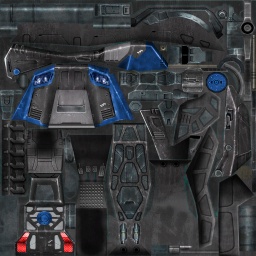
Assuming we already have a skin for our vehicle (the choice of whether to use Red or Blue is up to you), we open that in our image editing software:
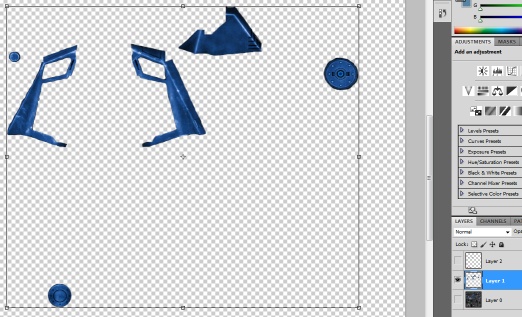
Create two additional layers. One of these layers is going to contain the parts we want to colorize, the other one should contain special symbols such as warning signs or other things the color of which should remain constant. Do this by selecting all the parts that should be colorized copy them to the color mask layer. Then select all the parts that should remain unchanged and copy (or cut/paste) them to the constant layer. The three layers I created look like this:
This took a while, eh? From here on it gets easier.
Make the base skin greyscale. This will make the result look as cool as my ECE vehicle conversions - and you gotta admit they KICK ASS! After that, copy the contents of our constant layer back to this base skin. The result should look like this:
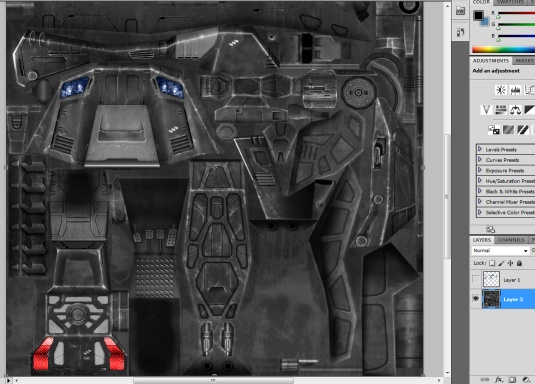
Save this texture (without the color layer) and you're done with the base skin as well as the neutral skin!
1.2 – Creating the color masks
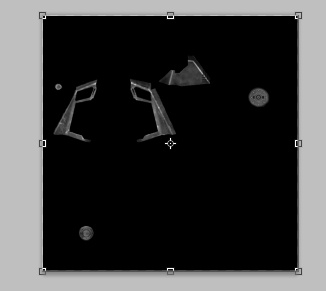
Now, create a new texture with a black background and put the color mask layer on it. Reduce the texture's size to something like 256x256. We don't need so much detail here because we only add color information, the result will look just fine (recall my awesome ECE conversions). Greyscale the color layer to make sure the base color you edit from doesn't get involved later.
At this point I can only explain how I do this in Photoshop. Those who use a different software will have to find an equivalent way to do this:
- Create a layer effect for the texture
- Select the Color Overlay bit and choose a strong red (255, 0, 0)
- Set the draw type to Color Burn
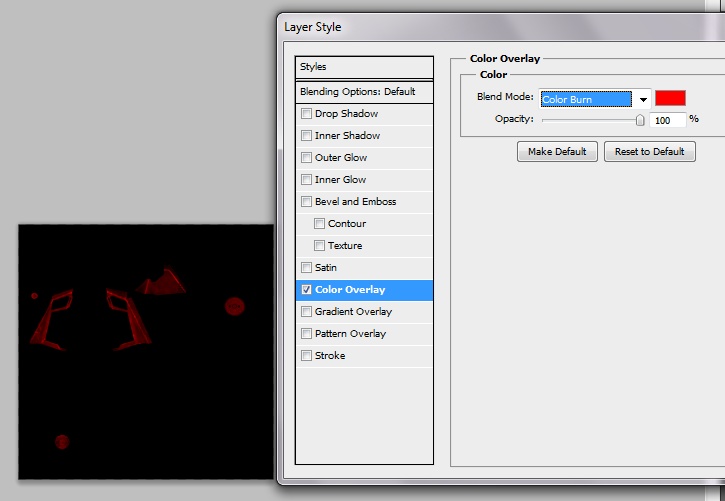
We have just created ourselves a red color overlay texture. Save this one and repeat the process for the other team colors. I recommend the following RGB values for the individual team colors:
- 255,0,0 for Red
- 64,160,255 for Blue
- 0,224,0 for Green
- 255,224,0 for Gold
1.3 – Finishing the skins in UnrealEd
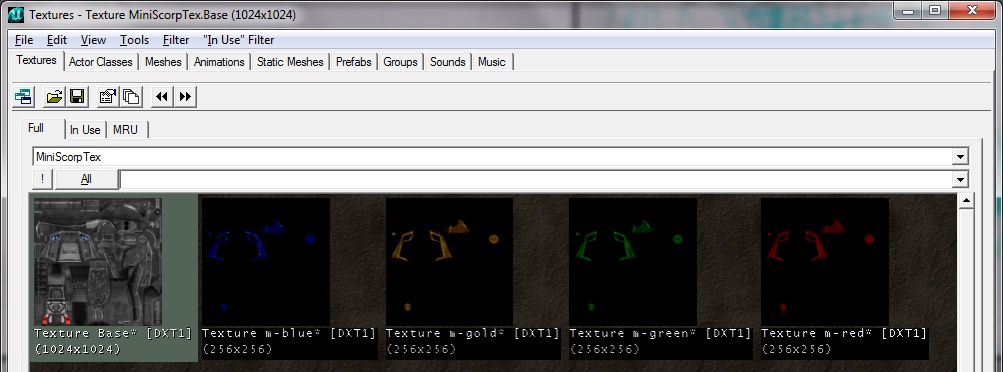
Import all the textures you created into UnrealEd into a new texture package. I'll call mine MiniScorpTex.utx. Remember to compress them as DXT1 after importing, that will make the textures a lot smaller and the quality loss is bearable for use in UT2004. Don't forget to set the LODSet of the textures to LODSET_PlayerSkin
Now, repeat the following steps for all 4 skins:
- Create a new Combiner.
- Set the CombineOperation to CO_Add
- Set the AlphaOperation to AO_UseMask
- Set the Material1 to the color mask
- Set the Material2 to the colorless skin
- Set the Mask to the color mask
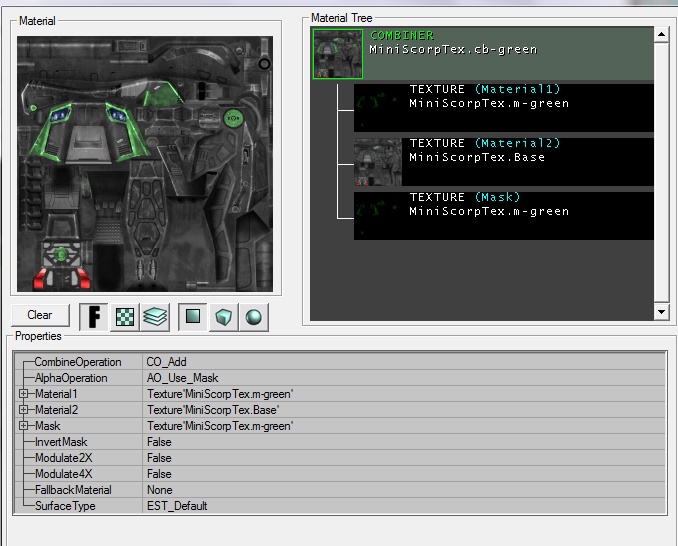
Voilŕ, we're done creating skins. Save the texture package, you (or your coder) will need it.
2 – Coding
We get to the coding part of the tutorial. I expect you to know how to set up and compile a UT2004 package and to know UnrealScript enough to understand what I will be doing.
2.1 – Get the source code
Assuming you are converting an existing vehicle like I do in my Minigun Scorpion example, you first should acquire its source code unless you want to recode it yourself (which is probably the better way from a copyright point of view, but that's not the matter at hand).
You can also choose an alternative way if the vehicle you are porting comes with a standalone package (ie in a .u file). Simply add that standalone package to your EditPackages and create a subclass of the vehicle. Note that your VCTF4 package will then require that original package to work.
2.2 – Setting up the project
By "project" I refer to a UT2004 package that is compiled from source code. Create your package directory in the UT2004 dir, add a Classes dir, put in the sources, etc. Copy your previously saved texture package into the package directory as well.
Note that you will need to add OLTeamVehicleGames to your EditPackages.
2.3 – Getting to work
Locate and open the vehicle's main source code file and add the following pieces of code to the file (or create a subclass with the following code added):
2.4 – Secondary seats
If your vehicle has any secondary seats (subclasses of ONSWeaponPawn, e.g. the HellBender Rear Gun), you'll need to modify (or subclass) them and register them in the vehicle base code. Add the following code:
2.5 – Turrets
If your vehicle comes with any additional turrets (subclasses of ONSWeapon, e.g. Tank Cannon, HellBender Rear Gun), you'll need to modify (or subclass) them and register them in the vehicle base or the respective WeaponPawn code. Add the following code:
Depending on what you are converting you might have to add some things to the effect code. Concerning side turrets, it is a good idea to have a look at the VCTF4 source code which is available on the downloads page.
3 – Adding the vehicle to the map
When you are done with the code and compiled it, you will have a .u file with your vehicle ready to use. Since you probably don't want your map to depend on that file, you should import it.
3.1 – Importing and placing
In the UnrealEd's command line field, enter the following command with your package's name (however, leave myLevel in there, it's the map package!):
You can now create your own vehicle factory or place any of the VCTF4 ones (do not use the stock UT2004 ones) and change the VehicleClass to your vehicle's class. And voilŕ, we're done!
Bad-ass! From here on, you might want to adjust the base skin and the color masks (especially their brightness) to fit your desires best.
4 – Releasing your vehicle
You might wonder: "Why all this hassle compiling a new package? Why not code inside UnrealEd's code editor?"
Well, firstly, it sucks. But apart from that, I chose to make this tutorial go the classic compilation way so you have a distributable .u file. You can release that file and others can use your VCTF4 vehicle on their maps or using vehicle replacement mods - and that's a good thing! Community ftw! Of course, people could still rip it from your map, so do whatever you like really. Releasing is just the cooler way if you ask me.
If you think your vehicle port is exceptionally useful (e.g. the Flare Raptor has been missing so far *hint hint*), please feel free to send it to me and I'll mirror it on this site as well!